How to Straighten Walls and Fix Lens Distortion in Photoshop
Straighten Walls & Fix Lens Distortion in Photoshop
Published on: July 9, 2025 | By: Admin
Wide-angle lenses are essential in real estate and architectural photography, but they often cause unwanted distortion — making walls appear curved or tilted. In this tutorial, you’ll learn how to straighten walls in Photoshop and fix lens distortion for a clean, professional look.
Why Fix Distortion in Real Estate Photos?
- Corrects unnatural lines and curves
- Makes rooms appear more balanced and proportional
- Improves the overall credibility and aesthetics of the listing
Step-by-Step: Straighten Walls and Fix Lens Distortion
- Open your image in Photoshop.
- Go to Filter > Camera Raw Filter.
- In the right panel, open the Geometry tab (grid icon).
- Click Auto to let Photoshop auto-correct vertical and horizontal distortion.
- If needed, use Vertical and Rotate sliders for manual adjustments.
- Enable Constrain Crop to avoid white edges after transformation.
- Click OK to apply the corrections.
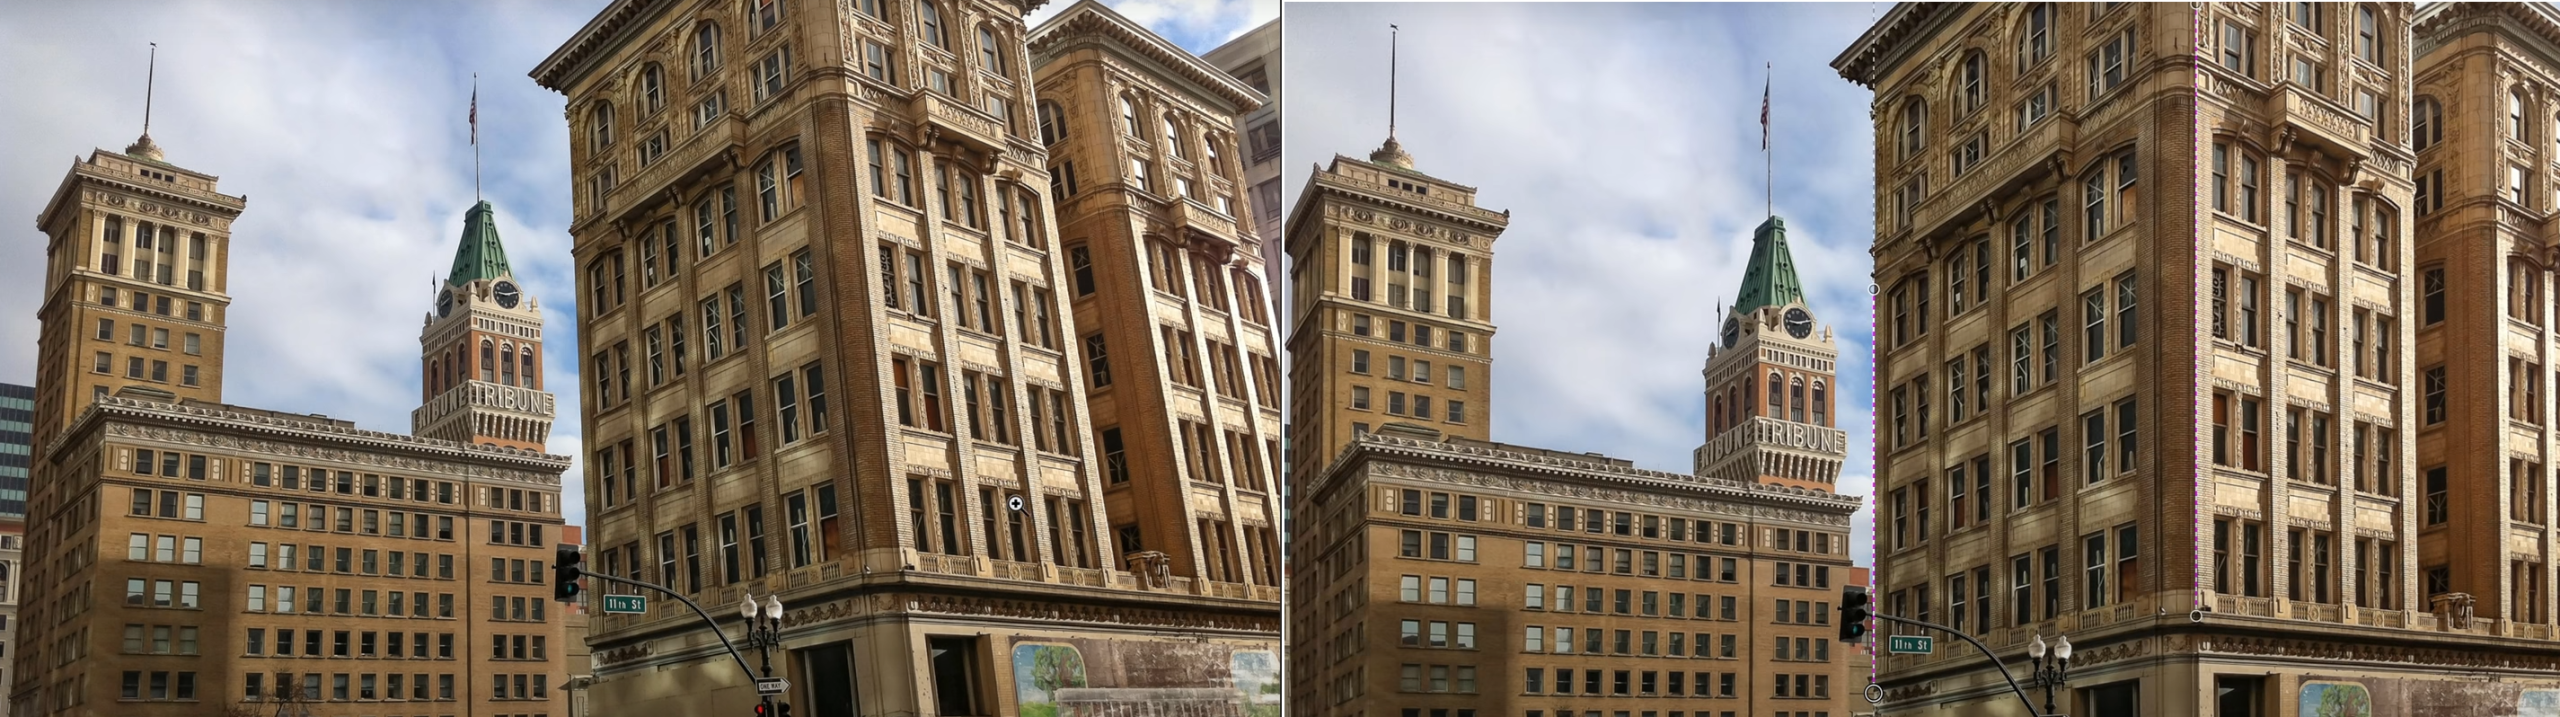
Before and After Example
Here’s a visual comparison after fixing lens distortion and straightening the walls:
Pro Tip
You can also use the Lens Correction Filter via Filter > Lens Correction for automatic profile-based fixes, especially for RAW images from supported cameras and lenses.
Conclusion
Knowing how to straighten walls in Photoshop and correct lens distortion is key for real estate and architectural photography. Clean lines create trust, professionalism, and visual harmony that buyers immediately notice.
0 Comments