Color Depth Techniques to Make Your Real Estate Photos Stand Out
Color Depth in Real Estate Photos – Techniques That Make Images Stand Out
Color depth in real estate photos can make or break the first impression of a property. When used correctly, it brings out the richness of interiors and exteriors, making your listings more vibrant, realistic, and professional. In this guide, you’ll learn essential Photoshop techniques to enhance color depth and give your real estate images the impact they deserve.
What Is Color Depth in Real Estate Photography?
Color depth refers to the range and intensity of colors displayed in an image. In real estate photography, improving color depth helps ensure smoother gradients, lifelike tones, and more immersive visuals.
Poor color depth can result in dull, flat, or washed-out images—something you definitely want to avoid in a competitive real estate market.
Why Color Depth Matters in Real Estate Photos
- It makes interiors look warmer and more welcoming.
- It brings life to exterior scenes like gardens, skies, or pools.
- It creates emotional appeal and attracts more buyers.
- It adds a premium, high-quality feel to your listings.
How to Enhance Color Depth in Real Estate Photos Using Photoshop
1. Convert to 16-Bit Color Mode
Go to Image > Mode > 16 Bits/Channel to work with a broader range of color tones and improve edit flexibility.
2. Use Camera Raw Filter
Open Filter > Camera Raw Filter. Here, you can adjust:
- Vibrance – to enhance muted colors without over-saturating.
- Saturation – for global color boost (use with care).
3. Apply Dehaze for Clarity
Dehaze increases midtone contrast and is great for improving skies or foggy scenes. A subtle value (10–20) works best.
4. Fine-Tune Colors with HSL Panel
In the HSL Adjustments section:
- Boost yellow and orange luminance to brighten interiors.
- Increase green saturation for outdoor landscaping.
- Adjust blue hue to enhance skies naturally.
5. Add Local Contrast with Dodge & Burn
Use the Dodge Tool to brighten highlights and the Burn Tool to deepen shadows on furniture or architectural elements.
6. Use Curves for Balanced Contrast
Apply an Adjustment Layer > Curves and use an S-curve to gently increase contrast, helping to deepen color intensity and visual depth.
Example Comparison
Here’s a visual example showing enhanced color depth in a real estate photo:
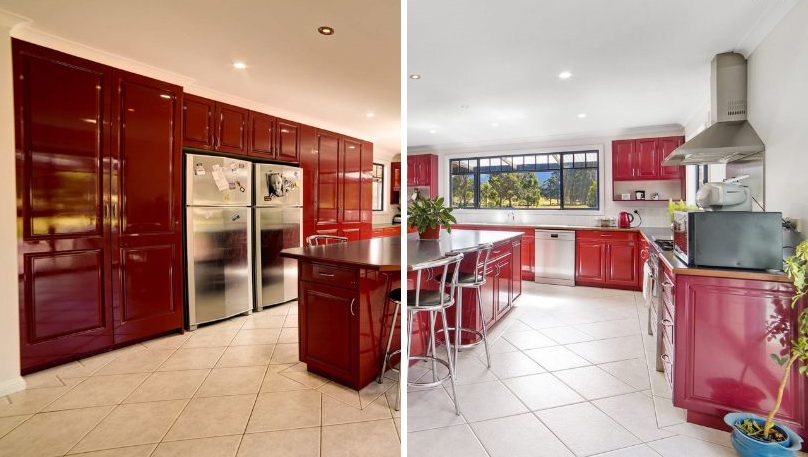
Left: Before | Right: Enhanced Color Depth
Pro Tips
- Shoot in RAW to preserve maximum color detail and editing flexibility.
- Always adjust color depth to match the feel of the property — warmer for cozy homes, cooler for modern ones.
- Don’t over-saturate. Subtle adjustments look more professional and natural.
Conclusion
Mastering color depth in real estate photos is a game-changer for any property photo editor. With the right Photoshop techniques, you can transform ordinary images into visually striking marketing assets that sell. Start applying these methods today to elevate your real estate photography portfolio.
0 Comments