Creating Daylight or Golden Hour Effects in Real Estate Photography
Creating Daylight or Golden Hour Effects in Real Estate Photography
Golden hour effects in real estate photography can transform dull or overcast images into stunning, warm, and emotionally compelling visuals. Whether your photo was taken on a cloudy day or in flat daylight, Photoshop offers powerful tools to simulate the look of morning sunlight or sunset glow — making your property photos more attractive and professional.
What Is the Golden Hour in Photography?
The golden hour refers to the short window after sunrise or before sunset when sunlight is warm, soft, and directional. It casts long shadows, adds natural highlights, and creates a welcoming atmosphere — ideal for real estate marketing.
Why Use Golden Hour Effects in Real Estate Photography?
- Improves the emotional appeal of the photo
- Makes homes appear warmer and more inviting
- Helps highlight architectural lines with natural contrast
- Useful when weather conditions are poor during actual shoot time
How to Create Golden Hour Effects in Real Estate Photography Using Photoshop
1. Open Your Photo and Duplicate the Layer
Always start by duplicating the original photo layer (Ctrl + J) to work non-destructively.
2. Add a Gradient Fill Adjustment Layer
Go to Layer > New Fill Layer > Gradient. Choose a gradient that transitions from warm orange/yellow to transparent. Set the gradient style to Radial or Linear depending on where you want the light to come from (top corner, side, etc.).
- Golden hour: Use warm tones like #FFA500 (orange) and #FFD700 (gold)
- Daylight: Use lighter yellows and soft white tones
3. Change Blending Mode and Opacity
Set the blending mode of the gradient layer to Soft Light or Overlay. Then reduce the opacity (usually 30–60%) to create a realistic lighting glow.
4. Add a Photo Filter Adjustment Layer
Go to Layer > New Adjustment Layer > Photo Filter. Choose Warming Filter (85) and increase the density to around 25–30%. This adds an overall warmth to your image without over-saturating it.
5. Enhance Shadows and Highlights
Use the Dodge Tool to brighten surfaces where the sunlight would naturally fall, and the Burn Tool to deepen shadows in less-lit areas. This adds depth and realism.
6. Optional: Add Sun Flare
Create a new blank layer. Use a large soft brush (set to white or yellow) and click once near the light source. Set this layer’s blending mode to Overlay and reduce opacity. This simulates a subtle sun flare.
Example Before & After
See the difference a golden hour effect can make:
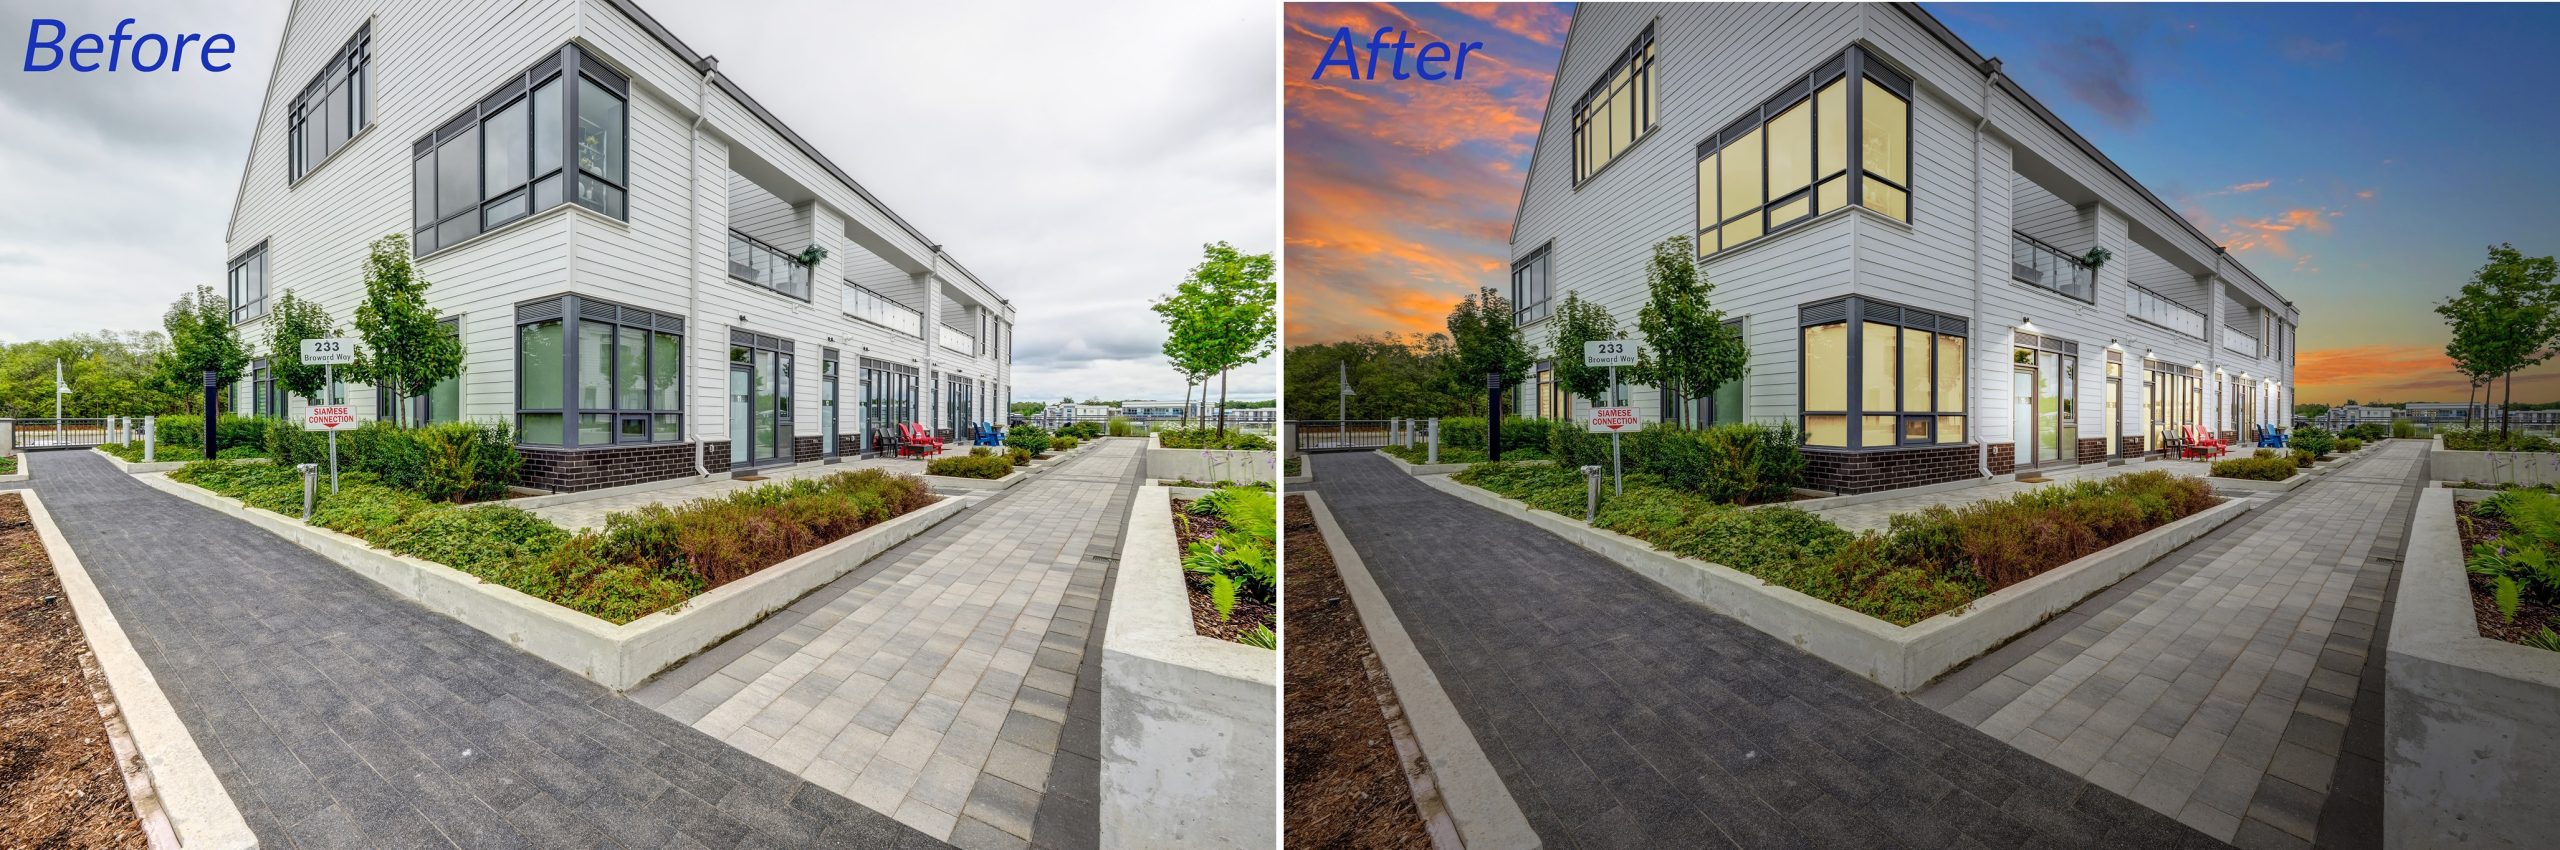
Left: Original | Right: Golden Hour Enhanced
Tips for Realistic Golden Hour Effects in Real Estate Photography
- Keep it subtle — overdoing the effect can make the image look fake.
- Observe real golden hour lighting and try to match shadow angles and intensity.
- Apply effects selectively using layer masks to avoid lighting indoor areas unnaturally.
Conclusion
Mastering golden hour effects in real estate photography gives you an edge when natural lighting conditions fall short. With just a few Photoshop techniques, you can turn ordinary photos into warm, inviting, and high-converting marketing visuals. Use these tricks to showcase properties at their very best — no matter what time of day you shot the image.
0 Comments